
ee00f0d52c
* feat: Add official Docker support

* Adding scarf data support

* Comment out pushing the image for now

* Getting env vars ported

* Renamed the job to Release instead of Remote Release

* Move the Dockerfile and docker-compose files to monorepo root

* Remove Slack notifications for failures for now

* Show database container status

* Setting env directly for testing

* Removing env var

* Adding container logs

* Change the volume

* fixing file paths

* Double-quotes wrecking things

* Fixing /calcom paths

* Update permission for scripts

* Fixed the Slack notification

* Updated Slack notification emojis

* Checking the workflow_dispatch input for checkout

* Commenting out the tag checkout for now since our new Docker files are not in main

* Added .dockerignore

* Remove the scarf data export

* Removed extra empty line

* refactor: Create reusable Docker build action for AMD64 and ARM support

- Extract common Docker build logic into reusable composite action
- Create separate workflows for AMD64 and ARM builds that run in parallel
- Both workflows use the same reusable action with platform-specific parameters
- ARM builds use ubuntu-24.04-arm runner and add -arm suffix to tags
- AMD64 builds use buildjet-4vcpu-ubuntu-2204 runner
- Remove old monolithic release-docker.yaml workflow

Co-Authored-By: keith@cal.com <keithwillcode@gmail.com>

* Revert "refactor: Create reusable Docker build action for AMD64 and ARM support"

This reverts commit 66d2c1741e094e8d39b928b109edaf67b6a1cc8e.

* refactor: Add parallel AMD64 and ARM Docker builds using reusable action

- Create reusable composite action in .github/actions/docker-build-and-test
- Extract common Docker build, test, and push logic into the action
- Update release-docker.yaml to have two parallel jobs:
  - release-amd64: Builds for linux/amd64 on buildjet-4vcpu-ubuntu-2204
  - release-arm: Builds for arm64 on ubuntu-24.04-arm with -arm suffix
- Both jobs use the same reusable action with platform-specific parameters
- Maintains existing functionality while enabling parallel builds

Co-Authored-By: keith@cal.com <keithwillcode@gmail.com>

* Update the ARM action to run on buildjet 4vCPU ARM

* Move the Dockerfile to apps/web

* Revert "Move the Dockerfile to apps/web"

This reverts commit fd91ebe5b4285cfa3416e6f869f567329ece8b23.

* Revert the arm machine back off build jet

* Use node 20

* Set push to true

* Remove Dockerfile.render

* Removed commented Docker lines

* Fixed read me

* Updated README for Docker support

---------

Co-authored-by: Devin AI <158243242+devin-ai-integration[bot]@users.noreply.github.com>
935 lines
53 KiB
Markdown
935 lines
53 KiB
Markdown
<!-- PROJECT LOGO -->
|
||
<p align="center">
|
||
<a href="https://github.com/calcom/cal.com">
|
||
<img src="https://user-images.githubusercontent.com/8019099/210054112-5955e812-a76e-4160-9ddd-58f2c72f1cce.png" alt="Logo">
|
||
</a>
|
||
|
||
<h3 align="center">Cal.com</h3>
|
||
|
||
<p align="center">
|
||
The open-source Calendly successor.
|
||
<br />
|
||
<a href="https://cal.com"><strong>Learn more »</strong></a>
|
||
<br />
|
||
<br />
|
||
<a href="https://github.com/calcom/cal.com/discussions">Discussions</a>
|
||
·
|
||
<a href="https://cal.com">Website</a>
|
||
·
|
||
<a href="https://github.com/calcom/cal.com/issues">Issues</a>
|
||
·
|
||
<a href="https://cal.com/roadmap">Roadmap</a>
|
||
</p>
|
||
</p>
|
||
|
||
<p align="center">
|
||
<a href="https://www.producthunt.com/products/cal-com"><img src="https://img.shields.io/badge/Product%20Hunt-%231%20Product%20of%20the%20Month-%23DA552E" alt="Product Hunt"></a>
|
||
<img src="https://api.checklyhq.com/v1/badges/groups/1120718?style=flat&theme=default" alt="Checkly QA">
|
||
<a href="https://status.cal.com"><img height="20px" src="https://betteruptime.com/status-badges/v1/monitor/a9kf.svg" alt="Uptime"></a>
|
||
<a href="https://github.com/calcom/cal.com/stargazers"><img src="https://img.shields.io/github/stars/calcom/cal.com" alt="Github Stars"></a>
|
||
<a href="https://news.ycombinator.com/item?id=34507672"><img src="https://img.shields.io/badge/Hacker%20News-%231-%23FF6600" alt="Hacker News"></a>
|
||
<a href="https://github.com/calcom/cal.com/blob/main/LICENSE"><img src="https://img.shields.io/badge/license-AGPLv3-purple" alt="License"></a>
|
||
<a href="https://github.com/calcom/cal.com/pulse"><img src="https://img.shields.io/github/commit-activity/m/calcom/cal.com" alt="Commits-per-month"></a>
|
||
<a href="https://cal.com/pricing"><img src="https://img.shields.io/badge/Pricing-Free-brightgreen" alt="Pricing"></a>
|
||
<a href="https://jitsu.com?utm_source=github/calcom/cal.com"><img src="https://img.shields.io/badge/Metrics_tracked_by-JITSU-AA00FF?logo=data:image/png;base64,iVBORw0KGgoAAAANSUhEUgAAAA4AAAAOCAYAAAAfSC3RAAAACXBIWXMAAAsTAAALEwEAmpwYAAAAAXNSR0IArs4c6QAAAARnQU1BAACxjwv8YQUAAACKSURBVHgBrZDRCYAwDEQv6gCOoKO4hOCXI9QVnEZwiY5iF5GaVClaBNtioCSUvCR3tMJaxIfZgW4AGUoEPVwgPZoS0Dmgg3NBVDFNbMIsmYCak3J1jDk9iCQvsKJvkzr71N81Gj6vDT/LU2P6RhY63jcafk3YJEbgeZpiFyc/5HJKv8Ef273NSfABGbQfUZhnOSAAAAAASUVORK5CYII=" alt="Jitsu Tracked"></a>
|
||
<img src="https://api.checklyhq.com/v1/badges/checks/5e048048-1b51-47ba-9209-60607507622e?responseTime=true" alt="Checkly Availability" />
|
||
<a href="https://hub.docker.com/r/calcom/cal.com"><img src="https://img.shields.io/docker/pulls/calcom/cal.com"></a>
|
||
<a href="https://twitch.tv/calcomtv"><img src="https://img.shields.io/twitch/status/calcomtv?style=flat"></a>
|
||
<a href="https://github.com/calcom/cal.com/issues?q=is:issue+is:open+label:%22%F0%9F%99%8B%F0%9F%8F%BB%E2%80%8D%E2%99%82%EF%B8%8Fhelp+wanted%22"><img src="https://img.shields.io/badge/Help%20Wanted-Contribute-blue"></a>
|
||
<a href="https://cal.com/figma"><img src="https://img.shields.io/badge/Figma-Design%20System-blueviolet"></a>
|
||
<a href="https://contributor-covenant.org/version/1/4/code-of-conduct/ "><img src="https://img.shields.io/badge/Contributor%20Covenant-1.4-purple" /></a>
|
||
<a href="https://console.algora.io/org/cal/bounties?status=open"><img src="https://img.shields.io/endpoint?url=https%3A%2F%2Fconsole.algora.io%2Fapi%2Fshields%2Fcal%2Fbounties%3Fstatus%3Dopen" /></a>
|
||
</p>
|
||
|
||
<!-- ABOUT THE PROJECT -->
|
||
|
||
## About the Project
|
||
|
||
<img width="100%" alt="booking-screen" src="https://github.com/calcom/cal.com/assets/8019099/407e727e-ff19-4ca4-bcae-049dca05cf02">
|
||
|
||
# Scheduling infrastructure for absolutely everyone
|
||
|
||
The open source Calendly successor. You are in charge
|
||
of your own data, workflow, and appearance.
|
||
|
||
Calendly and other scheduling tools are awesome. It made our lives massively easier. We're using it for business meetings, seminars, yoga classes, and even calls with our families. However, most tools are very limited in terms of control and customization.
|
||
|
||
That's where Cal.com comes in. Self-hosted or hosted by us. White-label by design. API-driven and ready to be deployed on your own domain. Full control of your events and data.
|
||
|
||
## Recognition
|
||
|
||
#### [Hacker News](https://news.ycombinator.com/from?site=cal.com)
|
||
|
||
<a href="https://news.ycombinator.com/item?id=34507672">
|
||
<img
|
||
style="width: 250px; height: 54px;" width="250" height="54"
|
||
alt="Featured on Hacker News"
|
||
src="https://hackernews-badge.vercel.app/api?id=34507672"
|
||
/>
|
||
</a>
|
||
|
||
<a href="https://news.ycombinator.com/item?id=26817795">
|
||
<img
|
||
style="width: 250px; height: 54px;" width="250" height="54"
|
||
alt="Featured on Hacker News"
|
||
src="https://hackernews-badge.vercel.app/api?id=26817795"
|
||
/>
|
||
</a>
|
||
|
||
#### [Product Hunt](https://producthunt.com/products/cal-com?utm_source=badge-top-post-badge&utm_medium=badge)
|
||
|
||
<a href="https://producthunt.com/posts/calendso?utm_source=badge-top-post-badge&utm_medium=badge&utm_souce=badge-calendso" target="_blank"><img src="https://api.producthunt.com/widgets/embed-image/v1/top-post-badge.svg?post_id=291910&theme=light&period=monthly" alt="Cal.com - The open source Calendly alternative | Product Hunt" style="width: 250px; height: 54px;" width="250" height="54" /></a> <a href="https://producthunt.com/posts/calendso?utm_source=badge-featured&utm_medium=badge&utm_souce=badge-calendso" target="_blank"><img src="https://api.producthunt.com/widgets/embed-image/v1/featured.svg?post_id=291910&theme=light" alt="Cal.com - The open source Calendly alternative | Product Hunt" style="width: 250px; height: 54px;" width="250" height="54" /></a> <a href="https://producthunt.com/stories/how-this-open-source-calendly-alternative-rocketed-to-product-of-the-day" target="_blank"><img src="https://cal.com/maker-grant.svg" alt="Cal.com - The open source Calendly alternative | Product Hunt" style="width: 250px; height: 54px;" width="250" height="54" /></a>
|
||
|
||
This project is tested with browserstack
|
||
|
||
### Built With
|
||
|
||
- [Next.js](https://nextjs.org/?ref=cal.com)
|
||
- [tRPC](https://trpc.io/?ref=cal.com)
|
||
- [React.js](https://reactjs.org/?ref=cal.com)
|
||
- [Tailwind CSS](https://tailwindcss.com/?ref=cal.com)
|
||
- [Prisma.io](https://prisma.io/?ref=cal.com)
|
||
- [Daily.co](https://go.cal.com/daily)
|
||
|
||
## Contact us
|
||
|
||
Meet our sales team for any commercial inquiries.
|
||
|
||
<a href="https://cal.com/sales"><img src="https://cal.com/book-with-cal-dark.svg" alt="Book us with Cal.com"></a>
|
||
|
||
## Stay Up-to-Date
|
||
|
||
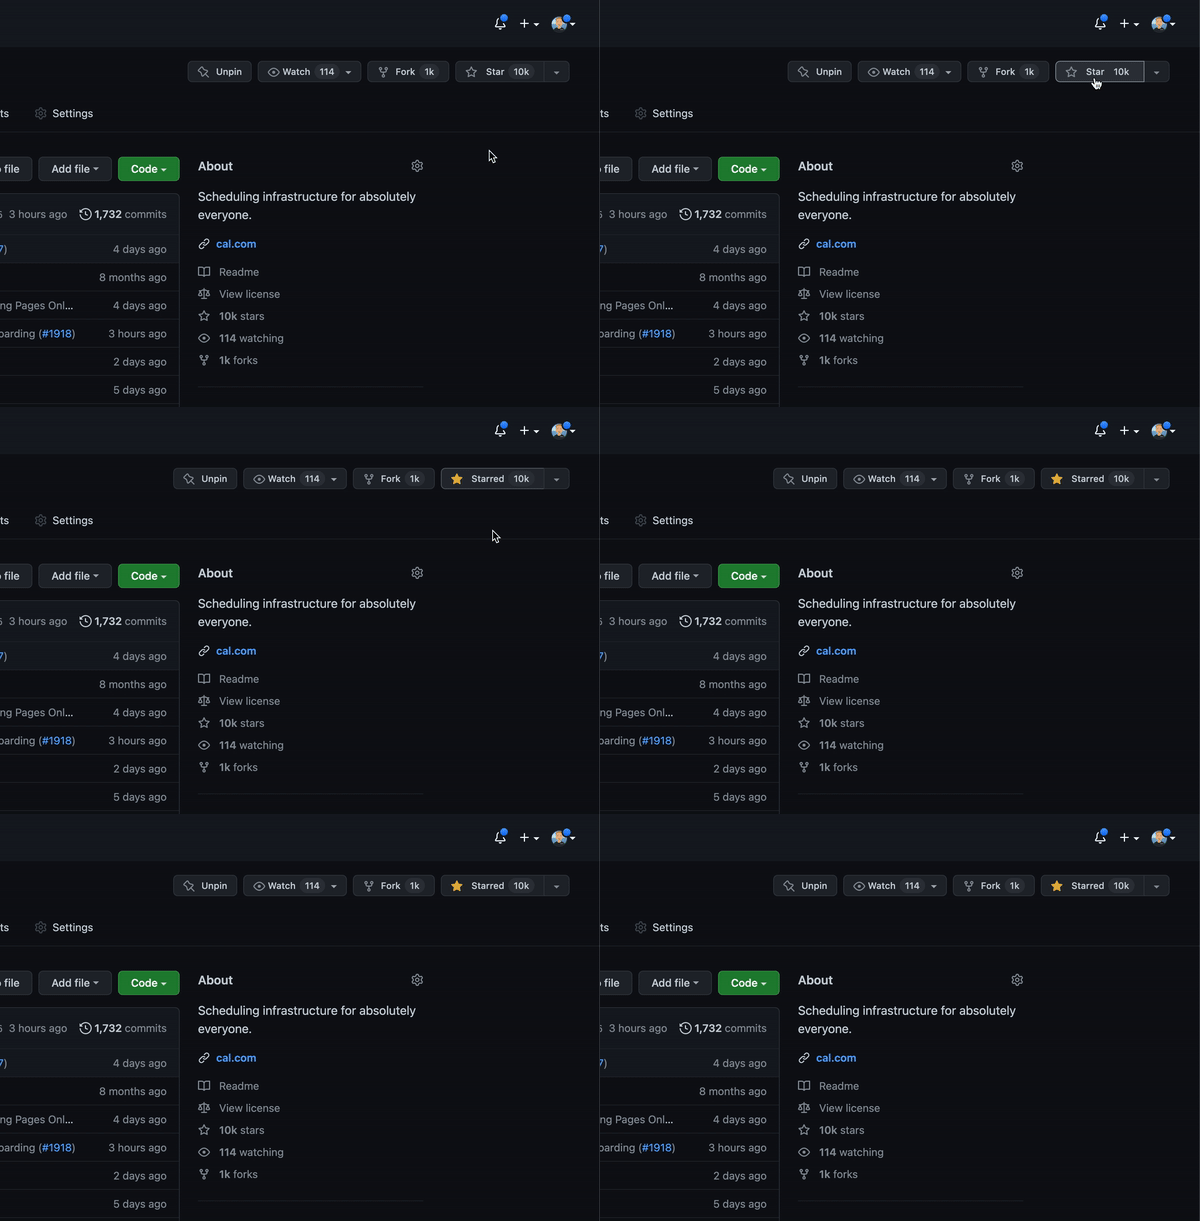
Cal.com officially launched as v.1.0 on the 15th of September 2021 and we've come a long way so far. Watch **releases** of this repository to be notified of future updates:
|
||
|
||
|
||
|
||
<!-- GETTING STARTED -->
|
||
|
||
## Getting Started
|
||
|
||
To get a local copy up and running, please follow these simple steps.
|
||
|
||
### Prerequisites
|
||
|
||
Here is what you need to be able to run Cal.com.
|
||
|
||
- Node.js (Version: >=18.x)
|
||
- PostgreSQL (Version: >=13.x)
|
||
- Yarn _(recommended)_
|
||
|
||
> If you want to enable any of the available integrations, you may want to obtain additional credentials for each one. More details on this can be found below under the [integrations section](#integrations).
|
||
|
||
## Development
|
||
|
||
### Setup
|
||
|
||
1. Clone the repo into a public GitHub repository (or fork https://github.com/calcom/cal.com/fork). If you plan to distribute the code, keep the source code public to comply with [AGPLv3](https://github.com/calcom/cal.com/blob/main/LICENSE). To clone in a private repository, [acquire a commercial license](https://cal.com/sales)
|
||
|
||
```sh
|
||
git clone https://github.com/calcom/cal.com.git
|
||
```
|
||
|
||
> If you are on Windows, run the following command on `gitbash` with admin privileges: <br> > `git clone -c core.symlinks=true https://github.com/calcom/cal.com.git` <br>
|
||
> See [docs](https://cal.com/docs/how-to-guides/how-to-troubleshoot-symbolic-link-issues-on-windows#enable-symbolic-links) for more details.
|
||
|
||
2. Go to the project folder
|
||
|
||
```sh
|
||
cd cal.com
|
||
```
|
||
|
||
3. Install packages with yarn
|
||
|
||
```sh
|
||
yarn
|
||
```
|
||
|
||
4. Set up your `.env` file
|
||
|
||
- Duplicate `.env.example` to `.env`
|
||
- Use `openssl rand -base64 32` to generate a key and add it under `NEXTAUTH_SECRET` in the `.env` file.
|
||
- Use `openssl rand -base64 32` to generate a key and add it under `CALENDSO_ENCRYPTION_KEY` in the `.env` file.
|
||
|
||
5. Setup Node
|
||
If your Node version does not meet the project's requirements as instructed by the docs, "nvm" (Node Version Manager) allows using Node at the version required by the project:
|
||
|
||
```sh
|
||
nvm use
|
||
```
|
||
|
||
You first might need to install the specific version and then use it:
|
||
|
||
```sh
|
||
nvm install && nvm use
|
||
```
|
||
|
||
You can install nvm from [here](https://github.com/nvm-sh/nvm).
|
||
|
||
#### Quick start with `yarn dx`
|
||
|
||
> - **Requires Docker and Docker Compose to be installed**
|
||
> - Will start a local Postgres instance with a few test users - the credentials will be logged in the console
|
||
|
||
```sh
|
||
yarn dx
|
||
```
|
||
|
||
#### Development tip
|
||
|
||
1. Add `export NODE_OPTIONS=“--max-old-space-size=16384”` to your shell script to increase the memory limit for the node process. Alternatively, you can run this in your terminal before running the app. Replace 16384 with the amount of RAM you want to allocate to the node process.
|
||
|
||
2. Add `NEXT_PUBLIC_LOGGER_LEVEL={level}` to your .env file to control the logging verbosity for all tRPC queries and mutations.\
|
||
Where {level} can be one of the following:
|
||
|
||
`0` for silly \
|
||
`1` for trace \
|
||
`2` for debug \
|
||
`3` for info \
|
||
`4` for warn \
|
||
`5` for error \
|
||
`6` for fatal
|
||
|
||
When you set `NEXT_PUBLIC_LOGGER_LEVEL={level}` in your .env file, it enables logging at that level and higher. Here's how it works:
|
||
|
||
The logger will include all logs that are at the specified level or higher. For example: \
|
||
|
||
- If you set `NEXT_PUBLIC_LOGGER_LEVEL=2`, it will log from level 2 (debug) upwards, meaning levels 2 (debug), 3 (info), 4 (warn), 5 (error), and (fatal) will be logged. \
|
||
- If you set `NEXT_PUBLIC_LOGGER_LEVEL=3`, it will log from level 3 (info) upwards, meaning levels 3 (info), 4 (warn), 5 (error), and 6 (fatal) will be logged, but level 2 (debug) and level 1 (trace) will be ignored. \
|
||
|
||
```sh
|
||
echo 'NEXT_PUBLIC_LOGGER_LEVEL=3' >> .env
|
||
```
|
||
|
||
for Logger level to be set at info, for example.
|
||
|
||
#### Gitpod Setup
|
||
|
||
1. Click the button below to open this project in Gitpod.
|
||
|
||
2. This will open a fully configured workspace in your browser with all the necessary dependencies already installed.
|
||
|
||
[](https://gitpod.io/#https://github.com/calcom/cal.com)
|
||
|
||
#### Manual setup
|
||
|
||
1. Configure environment variables in the `.env` file. Replace `<user>`, `<pass>`, `<db-host>`, and `<db-port>` with their applicable values
|
||
|
||
```
|
||
DATABASE_URL='postgresql://<user>:<pass>@<db-host>:<db-port>'
|
||
```
|
||
|
||
<details>
|
||
<summary>If you don't know how to configure the DATABASE_URL, then follow the steps here to create a quick local DB</summary>
|
||
|
||
1. [Download](https://www.postgresql.org/download/) and install postgres in your local (if you don't have it already).
|
||
|
||
2. Create your own local db by executing `createDB <DB name>`
|
||
|
||
3. Now open your psql shell with the DB you created: `psql -h localhost -U postgres -d <DB name>`
|
||
|
||
4. Inside the psql shell execute `\conninfo`. And you will get the following info.
|
||

|
||
|
||
5. Now extract all the info and add it to your DATABASE_URL. The url would look something like this
|
||
`postgresql://postgres:postgres@localhost:5432/Your-DB-Name`. The port is configurable and does not have to be 5432.
|
||
|
||
</details>
|
||
|
||
If you don't want to create a local DB. Then you can also consider using services like railway.app, Northflank or render.
|
||
|
||
- [Setup postgres DB with railway.app](https://docs.railway.app/guides/postgresql)
|
||
- [Setup postgres DB with Northflank](https://northflank.com/guides/deploy-postgres-database-on-northflank)
|
||
- [Setup postgres DB with render](https://render.com/docs/databases)
|
||
|
||
1. Copy and paste your `DATABASE_URL` from `.env` to `.env.appStore`.
|
||
|
||
1. Set up the database using the Prisma schema (found in `packages/prisma/schema.prisma`)
|
||
|
||
In a development environment, run:
|
||
|
||
```sh
|
||
yarn workspace @calcom/prisma db-migrate
|
||
```
|
||
|
||
In a production environment, run:
|
||
|
||
```sh
|
||
yarn workspace @calcom/prisma db-deploy
|
||
```
|
||
|
||
1. Run [mailhog](https://github.com/mailhog/MailHog) to view emails sent during development
|
||
|
||
> **_NOTE:_** Required when `E2E_TEST_MAILHOG_ENABLED` is "1"
|
||
|
||
```sh
|
||
docker pull mailhog/mailhog
|
||
docker run -d -p 8025:8025 -p 1025:1025 mailhog/mailhog
|
||
```
|
||
|
||
1. Run (in development mode)
|
||
|
||
```sh
|
||
yarn dev
|
||
```
|
||
|
||
#### Setting up your first user
|
||
|
||
##### Approach 1
|
||
|
||
1. Open [Prisma Studio](https://prisma.io/studio) to look at or modify the database content:
|
||
|
||
```sh
|
||
yarn db-studio
|
||
```
|
||
|
||
1. Click on the `User` model to add a new user record.
|
||
1. Fill out the fields `email`, `username`, `password`, and set `metadata` to empty `{}` (remembering to encrypt your password with [BCrypt](https://bcrypt-generator.com/)) and click `Save 1 Record` to create your first user.
|
||
> New users are set on a `TRIAL` plan by default. You might want to adjust this behavior to your needs in the `packages/prisma/schema.prisma` file.
|
||
1. Open a browser to [http://localhost:3000](http://localhost:3000) and login with your just created, first user.
|
||
|
||
##### Approach 2
|
||
|
||
Seed the local db by running
|
||
|
||
```sh
|
||
cd packages/prisma
|
||
yarn db-seed
|
||
```
|
||
|
||
The above command will populate the local db with dummy users.
|
||
|
||
### E2E-Testing
|
||
|
||
Be sure to set the environment variable `NEXTAUTH_URL` to the correct value. If you are running locally, as the documentation within `.env.example` mentions, the value should be `http://localhost:3000`.
|
||
|
||
```sh
|
||
# In a terminal just run:
|
||
yarn test-e2e
|
||
|
||
# To open the last HTML report run:
|
||
yarn playwright show-report test-results/reports/playwright-html-report
|
||
```
|
||
|
||
#### Resolving issues
|
||
|
||
##### E2E test browsers not installed
|
||
|
||
Run `npx playwright install` to download test browsers and resolve the error below when running `yarn test-e2e`:
|
||
|
||
```
|
||
Executable doesn't exist at /Users/alice/Library/Caches/ms-playwright/chromium-1048/chrome-mac/Chromium.app/Contents/MacOS/Chromium
|
||
```
|
||
|
||
### Upgrading from earlier versions
|
||
|
||
1. Pull the current version:
|
||
|
||
```sh
|
||
git pull
|
||
```
|
||
|
||
1. Check if dependencies got added/updated/removed
|
||
|
||
```sh
|
||
yarn
|
||
```
|
||
|
||
1. Apply database migrations by running <b>one of</b> the following commands:
|
||
|
||
In a development environment, run:
|
||
|
||
```sh
|
||
yarn workspace @calcom/prisma db-migrate
|
||
```
|
||
|
||
(This can clear your development database in some cases)
|
||
|
||
In a production environment, run:
|
||
|
||
```sh
|
||
yarn workspace @calcom/prisma db-deploy
|
||
```
|
||
|
||
1. Check for `.env` variables changes
|
||
|
||
```sh
|
||
yarn predev
|
||
```
|
||
|
||
1. Start the server. In a development environment, just do:
|
||
|
||
```sh
|
||
yarn dev
|
||
```
|
||
|
||
For a production build, run for example:
|
||
|
||
```sh
|
||
yarn build
|
||
yarn start
|
||
```
|
||
|
||
1. Enjoy the new version.
|
||
<!-- DEPLOYMENT -->
|
||
|
||
## Deployment
|
||
|
||
### Docker
|
||
|
||
**Official support**: Our team will begin to officially support the Dockerfile and docker-compose resources in this
|
||
repository.
|
||
|
||
**Important**: Cal.com will **not** be supporting installations that use these Docker resources. While we provide and maintain the Docker configurations, support for Docker-based installations is the responsibility of the user.
|
||
|
||
This image can be found on DockerHub at [https://hub.docker.com/r/calcom/cal.com](https://hub.docker.com/r/calcom/cal.com).
|
||
|
||
**Note for ARM Users**: Use the {version}-arm suffix for pulling images. Example: `docker pull calcom/cal.com:v5.6.19-arm`.
|
||
|
||
#### Requirements
|
||
|
||
Make sure you have `docker` & `docker compose` installed on the server / system. Both are installed by most docker utilities, including Docker Desktop and Rancher Desktop.
|
||
|
||
Note: `docker compose` without the hyphen is now the primary method of using docker-compose, per the Docker documentation.
|
||
|
||
#### (Most users) Running Cal.com with Docker Compose
|
||
|
||
If you are evaluating Cal.com or running with minimal to no modifications, this option is for you.
|
||
|
||
1. Clone calcom/cal.com
|
||
|
||
```bash
|
||
git clone --recursive https://github.com/calcom/cal.com.git
|
||
```
|
||
|
||
2. Change into the directory
|
||
|
||
```bash
|
||
cd cal.com
|
||
```
|
||
|
||
3. Prepare your configuration: Rename `.env.example` to `.env` and then update `.env`
|
||
|
||
```bash
|
||
cp .env.example .env
|
||
```
|
||
|
||
Most configurations can be left as-is, but for configuration options see [Important Run-time variables](#important-run-time-variables) below.
|
||
|
||
**Push Notifications (VAPID Keys)**
|
||
If you see an error like:
|
||
|
||
```
|
||
Error: No key set vapidDetails.publicKey
|
||
```
|
||
|
||
This means your environment variables for Web Push are missing.
|
||
You must generate and set `NEXT_PUBLIC_VAPID_PUBLIC_KEY` and `VAPID_PRIVATE_KEY`.
|
||
|
||
Generate them with:
|
||
|
||
```bash
|
||
npx web-push generate-vapid-keys
|
||
```
|
||
|
||
Then update your `.env` file:
|
||
|
||
```env
|
||
NEXT_PUBLIC_VAPID_PUBLIC_KEY=your_public_key_here
|
||
VAPID_PRIVATE_KEY=your_private_key_here
|
||
```
|
||
|
||
Do **not** commit real keys to `.env.example` — only placeholders.
|
||
|
||
Update the appropriate values in your .env file, then proceed.
|
||
|
||
4. (optional) Pre-Pull the images by running the following command:
|
||
|
||
```bash
|
||
docker compose pull
|
||
```
|
||
|
||
This will use the default image locations as specified by `image:` in the docker-compose.yaml file.
|
||
|
||
Note: To aid with support, by default Scarf.sh is used as registry proxy for download metrics.
|
||
|
||
5. Start Cal.com via docker compose
|
||
|
||
(Most basic users, and for First Run) To run the complete stack, which includes a local Postgres database, Cal.com web app, and Prisma Studio:
|
||
|
||
```bash
|
||
docker compose up -d
|
||
```
|
||
|
||
To run Cal.com web app and Prisma Studio against a remote database, ensure that DATABASE_URL is configured for an available database and run:
|
||
|
||
```bash
|
||
docker compose up -d calcom studio
|
||
```
|
||
|
||
To run only the Cal.com web app, ensure that DATABASE_URL is configured for an available database and run:
|
||
|
||
```bash
|
||
docker compose up -d calcom
|
||
```
|
||
|
||
**Note: to run in attached mode for debugging, remove `-d` from your desired run command.**
|
||
|
||
6. Open a browser to [http://localhost:3000](http://localhost:3000), or your defined NEXT_PUBLIC_WEBAPP_URL. The first time you run Cal.com, a setup wizard will initialize. Define your first user, and you're ready to go!
|
||
|
||
#### Updating Cal.com
|
||
|
||
1. Stop the Cal.com stack
|
||
|
||
```bash
|
||
docker compose down
|
||
```
|
||
|
||
2. Pull the latest changes
|
||
|
||
```bash
|
||
docker compose pull
|
||
```
|
||
|
||
3. Update env vars as necessary.
|
||
4. Re-start the Cal.com stack
|
||
|
||
```bash
|
||
docker compose up -d
|
||
```
|
||
|
||
#### (Advanced users) Build and Run Cal.com
|
||
|
||
1. Clone calcom/docker.
|
||
|
||
```bash
|
||
git clone https://github.com/calcom/cal.com.git calcom-docker
|
||
```
|
||
|
||
2. Change into the directory
|
||
|
||
```bash
|
||
cd calcom-docker
|
||
```
|
||
|
||
3. Update the calcom submodule. This project depends on the Cal.com source code, which is included here as a Git submodule. To make sure you get everything you need, update the submodule with the command below.
|
||
|
||
```bash
|
||
git submodule update --remote --init
|
||
```
|
||
|
||
Note: DO NOT use recursive submodule update, otherwise you will receive a git authentication error.
|
||
|
||
4. Rename `.env.example` to `.env` and then update `.env`
|
||
|
||
For configuration options see [Build-time variables](#build-time-variables) below. Update the appropriate values in your .env file, then proceed.
|
||
|
||
5. Build the Cal.com docker image:
|
||
|
||
Note: Due to application configuration requirements, an available database is currently required during the build process.
|
||
|
||
a) If hosting elsewhere, configure the `DATABASE_URL` in the .env file, and skip the next step
|
||
|
||
b) If a local or temporary database is required, start a local database via docker compose.
|
||
|
||
```bash
|
||
docker compose up -d database
|
||
```
|
||
|
||
6. Build Cal.com via docker compose (DOCKER_BUILDKIT=0 must be provided to allow a network bridge to be used at build time. This requirement will be removed in the future)
|
||
|
||
```bash
|
||
DOCKER_BUILDKIT=0 docker compose build calcom
|
||
```
|
||
|
||
7. Start Cal.com via docker compose
|
||
|
||
(Most basic users, and for First Run) To run the complete stack, which includes a local Postgres database, Cal.com web app, and Prisma Studio:
|
||
|
||
```bash
|
||
docker compose up -d
|
||
```
|
||
|
||
To run Cal.com web app and Prisma Studio against a remote database, ensure that DATABASE_URL is configured for an available database and run:
|
||
|
||
```bash
|
||
docker compose up -d calcom studio
|
||
```
|
||
|
||
To run only the Cal.com web app, ensure that DATABASE_URL is configured for an available database and run:
|
||
|
||
```bash
|
||
docker compose up -d calcom
|
||
```
|
||
|
||
**Note: to run in attached mode for debugging, remove `-d` from your desired run command.**
|
||
|
||
8. Open a browser to [http://localhost:3000](http://localhost:3000), or your defined NEXT_PUBLIC_WEBAPP_URL. The first time you run Cal.com, a setup wizard will initialize. Define your first user, and you're ready to go!
|
||
|
||
#### Configuration
|
||
|
||
##### Important Run-time variables
|
||
|
||
These variables must also be provided at runtime
|
||
|
||
| Variable | Description | Required | Default |
|
||
| ----------------------- | -------------------------------------------------------------------------------------------------------------------------------------------------------------------------------- | -------- | ------------------------------------------------------------------- |
|
||
| DATABASE_URL | database url with credentials - if using a connection pooler, this setting should point there | required | `postgresql://unicorn_user:magical_password@database:5432/calendso` |
|
||
| CALCOM_LICENSE_KEY | Enterprise License Key | optional | |
|
||
| NEXT_PUBLIC_WEBAPP_URL | Base URL of the site. NOTE: if this value differs from the value used at build-time, there will be a slight delay during container start (to update the statically built files). | optional | `http://localhost:3000` |
|
||
| NEXTAUTH_URL | Location of the auth server. By default, this is the Cal.com docker instance itself. | optional | `{NEXT_PUBLIC_WEBAPP_URL}/api/auth` |
|
||
| NEXTAUTH_SECRET | must match build variable | required | `secret` |
|
||
| CALENDSO_ENCRYPTION_KEY | must match build variable | required | `secret` |
|
||
|
||
##### Build-time variables
|
||
|
||
If building the image yourself, these variables must be provided at the time of the docker build, and can be provided by updating the .env file. Currently, if you require changes to these variables, you must follow the instructions to build and publish your own image.
|
||
|
||
Updating these variables is not required for evaluation, but is required for running in production. Instructions for generating variables can be found in the [Cal.com instructions](https://github.com/calcom/cal.com)
|
||
|
||
| Variable | Description | Required | Default |
|
||
| -------------------------------------- | ------------------------------------------------------------------------------------------------------------------------------------------ | -------- | ------------------------------------------------------------------- |
|
||
| DATABASE_URL | database url with credentials - if using a connection pooler, this setting should point there | required | `postgresql://unicorn_user:magical_password@database:5432/calendso` |
|
||
| MAX_OLD_SPACE_SIZE | Needed for Nodejs/NPM build options | required | 4096 |
|
||
| NEXT_PUBLIC_LICENSE_CONSENT | license consent - true/false | required | |
|
||
| NEXTAUTH_SECRET | Cookie encryption key | required | `secret` |
|
||
| CALENDSO_ENCRYPTION_KEY | Authentication encryption key | required | `secret` |
|
||
| NEXT_PUBLIC_WEBAPP_URL | Base URL injected into static files | optional | `http://localhost:3000` |
|
||
| NEXT_PUBLIC_WEBSITE_TERMS_URL | custom URL for terms and conditions website | optional | `https://cal.com/terms` |
|
||
| NEXT_PUBLIC_WEBSITE_PRIVACY_POLICY_URL | custom URL for privacy policy website | optional | `https://cal.com/privacy` |
|
||
| NEXT_PUBLIC_API_V2_URL | URL for the v2 API, only required for custom integrations or custom booking experiences using [Cal.com Platform](https://cal.com/platform) | optional | |
|
||
| CALCOM_TELEMETRY_DISABLED | Allow Cal.com to collect anonymous usage data (set to `1` to disable) | optional | |
|
||
| NEXT_PUBLIC_SINGLE_ORG_SLUG | Required if ORGANIZATIONS_ENABLED is true | optional | |
|
||
| ORGANIZATIONS_ENABLED | Used for Enterprise or Organizations plan | optional | |
|
||
|
||
#### Troubleshooting
|
||
|
||
##### SSL edge termination
|
||
|
||
If running behind a load balancer which handles SSL certificates, you will need to add the environmental variable `NODE_TLS_REJECT_UNAUTHORIZED=0` to prevent requests from being rejected. Only do this if you know what you are doing and trust the services/load-balancers directing traffic to your service.
|
||
|
||
##### Failed to commit changes: Invalid 'prisma.user.create()'
|
||
|
||
Certain versions may have trouble creating a user if the field `metadata` is empty. Using an empty json object `{}` as the field value should resolve this issue. Also, the `id` field will autoincrement, so you may also try leaving the value of `id` as empty.
|
||
|
||
##### CLIENT_FETCH_ERROR
|
||
|
||
If you experience this error, it may be the way the default Auth callback in the server is using the WEBAPP_URL as a base url. The container does not necessarily have access to the same DNS as your local machine, and therefor needs to be configured to resolve to itself. You may be able to correct this by configuring `NEXTAUTH_URL=http://localhost:3000/api/auth`, to help the backend loop back to itself.
|
||
|
||
```
|
||
docker-calcom-1 | @calcom/web:start: [next-auth][error][CLIENT_FETCH_ERROR]
|
||
docker-calcom-1 | @calcom/web:start: https://next-auth.js.org/errors#client_fetch_error request to http://testing.localhost:3000/api/auth/session failed, reason: getaddrinfo ENOTFOUND testing.localhost {
|
||
docker-calcom-1 | @calcom/web:start: error: {
|
||
docker-calcom-1 | @calcom/web:start: message: 'request to http://testing.localhost:3000/api/auth/session failed, reason: getaddrinfo ENOTFOUND testing.localhost',
|
||
docker-calcom-1 | @calcom/web:start: stack: 'FetchError: request to http://testing.localhost:3000/api/auth/session failed, reason: getaddrinfo ENOTFOUND testing.localhost\n' +
|
||
docker-calcom-1 | @calcom/web:start: ' at ClientRequest.<anonymous> (/calcom/node_modules/next/dist/compiled/node-fetch/index.js:1:65756)\n' +
|
||
docker-calcom-1 | @calcom/web:start: ' at ClientRequest.emit (node:events:513:28)\n' +
|
||
docker-calcom-1 | @calcom/web:start: ' at ClientRequest.emit (node:domain:489:12)\n' +
|
||
docker-calcom-1 | @calcom/web:start: ' at Socket.socketErrorListener (node:_http_client:494:9)\n' +
|
||
docker-calcom-1 | @calcom/web:start: ' at Socket.emit (node:events:513:28)\n' +
|
||
docker-calcom-1 | @calcom/web:start: ' at Socket.emit (node:domain:489:12)\n' +
|
||
docker-calcom-1 | @calcom/web:start: ' at emitErrorNT (node:internal/streams/destroy:157:8)\n' +
|
||
docker-calcom-1 | @calcom/web:start: ' at emitErrorCloseNT (node:internal/streams/destroy:122:3)\n' +
|
||
docker-calcom-1 | @calcom/web:start: ' at processTicksAndRejections (node:internal/process/task_queues:83:21)',
|
||
docker-calcom-1 | @calcom/web:start: name: 'FetchError'
|
||
docker-calcom-1 | @calcom/web:start: },
|
||
docker-calcom-1 | @calcom/web:start: url: 'http://testing.localhost:3000/api/auth/session',
|
||
docker-calcom-1 | @calcom/web:start: message: 'request to http://testing.localhost:3000/api/auth/session failed, reason: getaddrinfo ENOTFOUND testing.localhost'
|
||
docker-calcom-1 | @calcom/web:start: }
|
||
```
|
||
|
||
<img referrerpolicy="no-referrer-when-downgrade" src="https://static.scarf.sh/a.png?x-pxid=81cda9f7-a102-453b-ac01-51c35650bd70" />
|
||
|
||
### Railway
|
||
|
||
[](https://railway.app/new/template/cal)
|
||
|
||
You can deploy Cal.com on [Railway](https://railway.app) using the button above. The team at Railway also have a [detailed blog post](https://blog.railway.app/p/calendso) on deploying Cal.com on their platform.
|
||
|
||
### Northflank
|
||
|
||
[](https://northflank.com/stacks/deploy-calcom)
|
||
|
||
You can deploy Cal.com on [Northflank](https://northflank.com) using the button above. The team at Northflank also have a [detailed blog post](https://northflank.com/guides/deploy-calcom-with-northflank) on deploying Cal.com on their platform.
|
||
|
||
### Vercel
|
||
|
||
Currently Vercel Pro Plan is required to be able to Deploy this application with Vercel, due to limitations on the number of serverless functions on the free plan.
|
||
|
||
[](https://vercel.com/new/clone?repository-url=https%3A%2F%2Fgithub.com%2Fcalcom%2Fcal.com&env=DATABASE_URL,NEXT_PUBLIC_WEBAPP_URL,NEXTAUTH_URL,NEXTAUTH_SECRET,CRON_API_KEY,CALENDSO_ENCRYPTION_KEY&envDescription=See%20all%20available%20env%20vars&envLink=https%3A%2F%2Fgithub.com%2Fcalcom%2Fcal.com%2Fblob%2Fmain%2F.env.example&project-name=cal&repo-name=cal.com&build-command=cd%20../..%20%26%26%20yarn%20build&root-directory=apps%2Fweb%2F)
|
||
|
||
### Render
|
||
|
||
[](https://render.com/deploy?repo=https://github.com/calcom/docker)
|
||
|
||
### Elestio
|
||
|
||
[](https://elest.io/open-source/cal.com)
|
||
|
||
<!-- ROADMAP -->
|
||
|
||
## Roadmap
|
||
|
||
<a href="https://cal.com/roadmap"><img src="https://user-images.githubusercontent.com/8019099/176388295-25081ca4-207e-4468-8079-37b195fa8e59.png" alt="Cal.com Roadmap" /></a>
|
||
|
||
See the [roadmap project](https://cal.com/roadmap) for a list of proposed features (and known issues). You can change the view to see planned tagged releases.
|
||
|
||
<!-- LICENSE -->
|
||
|
||
## License
|
||
|
||
Cal.com, Inc. is a commercial open source company, which means some parts of this open source repository require a commercial license. The concept is called "Open Core" where the core technology (99%) is fully open source, licensed under [AGPLv3](https://opensource.org/license/agpl-v3) and the last 1% is covered under a commercial license (["/ee" Enterprise Edition](https://github.com/calcom/cal.com/tree/main/packages/features/ee)) which we believe is entirely relevant for larger organisations that require enterprise features. Enterprise features are built by the core engineering team of Cal.com, Inc. which is hired in full-time. Find their compensation on https://cal.com/open.
|
||
|
||
> [!NOTE]
|
||
> Our philosophy is simple, all "Singleplayer APIs" are open-source under AGPLv3. All commercial "Multiplayer APIs" are under a commercial license.
|
||
|
||
| | AGPLv3 | EE |
|
||
| --------------------------------- | ------ | --- |
|
||
| Self-host for commercial purposes | ✅ | ✅ |
|
||
| Clone privately | ✅ | ✅ |
|
||
| Fork publicly | ✅ | ✅ |
|
||
| Requires CLA | ✅ | ✅ |
|
||
| Official Support | ❌ | ✅ |
|
||
| Derivative work privately | ❌ | ✅ |
|
||
| SSO | ❌ | ✅ |
|
||
| Admin Panel | ❌ | ✅ |
|
||
| Impersonation | ❌ | ✅ |
|
||
| Managed Event Types | ❌ | ✅ |
|
||
| Organizations | ❌ | ✅ |
|
||
| Payments | ❌ | ✅ |
|
||
| Platform | ❌ | ✅ |
|
||
| Teams | ❌ | ✅ |
|
||
| Users | ❌ | ✅ |
|
||
| Video | ❌ | ✅ |
|
||
| Workflows | ❌ | ✅ |
|
||
|
||
> [!TIP]
|
||
> We work closely with the community and always invite feedback about what should be open and what is fine to be commercial. This list is not set and stone and we have moved things from commercial to open in the past. Please open a [discussion](https://github.com/calcom/cal.com/discussions) if you feel like something is wrong.
|
||
|
||
## Repo Activity
|
||
|
||
<img width="100%" src="https://repobeats.axiom.co/api/embed/6bfca2f20f39738048b6e70ca205efde46352c3d.svg" />
|
||
|
||
<!-- CONTRIBUTING -->
|
||
|
||
## Contributing
|
||
|
||
Please see our [contributing guide](/CONTRIBUTING.md).
|
||
|
||
### Good First Issues
|
||
|
||
We have a list of [help wanted](https://github.com/calcom/cal.com/issues?q=is:issue+is:open+label:%22%F0%9F%99%8B%F0%9F%8F%BB%E2%80%8D%E2%99%82%EF%B8%8Fhelp+wanted%22) that contain small features and bugs which have a relatively limited scope. This is a great place to get started, gain experience, and get familiar with our contribution process.
|
||
|
||
<!-- BOUNTIES -->
|
||
|
||
### Bounties
|
||
|
||
<a href="https://console.algora.io/org/cal/bounties?status=open">
|
||
<picture>
|
||
<source media="(prefers-color-scheme: dark)" srcset="https://console.algora.io/api/og/cal/bounties.png?p=0&status=open&theme=dark">
|
||
<img alt="Bounties of cal" src="https://console.algora.io/api/og/cal/bounties.png?p=0&status=open&theme=light">
|
||
</picture>
|
||
</a>
|
||
|
||
<!-- CONTRIBUTORS -->
|
||
|
||
### Contributors
|
||
|
||
<a href="https://github.com/calcom/cal.com/graphs/contributors">
|
||
<img src="https://contrib.rocks/image?repo=calcom/cal.com" />
|
||
</a>
|
||
|
||
<!-- TRANSLATIONS -->
|
||
|
||
### Translations
|
||
|
||
Don't code but still want to contribute? Join our [Discussions](https://github.com/calcom/cal.com/discussions) and join the [#Translate channel](https://github.com/calcom/cal.com/discussions/categories/translations) and let us know what language you want to translate.
|
||
|
||
                           
|
||
|
||
## Enabling Content Security Policy
|
||
|
||
- Set CSP_POLICY="non-strict" env variable, which enables [Strict CSP](https://web.dev/strict-csp/) except for unsafe-inline in style-src . If you have some custom changes in your instance, you might have to make some code change to make your instance CSP compatible. Right now it enables strict CSP only on login page and on other SSR pages it is enabled in Report only mode to detect possible issues. On, SSG pages it is still not supported.
|
||
|
||
## Single Org Mode
|
||
|
||
Refer to docs [here](./docs/self-hosting/guides/organization/single-organization-setup) for a detailed documentation with screenshots.
|
||
|
||
## Integrations
|
||
|
||
### Obtaining the Google API Credentials
|
||
|
||
1. Open [Google API Console](https://console.cloud.google.com/apis/dashboard). If you don't have a project in your Google Cloud subscription, you'll need to create one before proceeding further. Under Dashboard pane, select Enable APIS and Services.
|
||
2. In the search box, type calendar and select the Google Calendar API search result.
|
||
3. Enable the selected API.
|
||
4. Next, go to the [OAuth consent screen](https://console.cloud.google.com/apis/credentials/consent) from the side pane. Select the app type (Internal or External) and enter the basic app details on the first page.
|
||
5. In the second page on Scopes, select Add or Remove Scopes. Search for Calendar.event and select the scope with scope value `.../auth/calendar.events`, `.../auth/calendar.readonly` and select Update.
|
||
6. In the third page (Test Users), add the Google account(s) you'll be using. Make sure the details are correct on the last page of the wizard and your consent screen will be configured.
|
||
7. Now select [Credentials](https://console.cloud.google.com/apis/credentials) from the side pane and then select Create Credentials. Select the OAuth Client ID option.
|
||
8. Select Web Application as the Application Type.
|
||
9. Under Authorized redirect URI's, select Add URI and then add the URI `<Cal.com URL>/api/integrations/googlecalendar/callback` and `<Cal.com URL>/api/auth/callback/google` replacing Cal.com URL with the URI at which your application runs.
|
||
10. The key will be created and you will be redirected back to the Credentials page. Select the newly generated client ID under OAuth 2.0 Client IDs.
|
||
11. Select Download JSON. Copy the contents of this file and paste the entire JSON string in the `.env` file as the value for `GOOGLE_API_CREDENTIALS` key.
|
||
|
||
#### _Adding google calendar to Cal.com App Store_
|
||
|
||
After adding Google credentials, you can now Google Calendar App to the app store.
|
||
You can repopulate the App store by running
|
||
|
||
```
|
||
cd packages/prisma
|
||
yarn seed-app-store
|
||
```
|
||
|
||
You will need to complete a few more steps to activate Google Calendar App.
|
||
Make sure to complete section "Obtaining the Google API Credentials". After that do the
|
||
following
|
||
|
||
1. Add extra redirect URL `<Cal.com URL>/api/auth/callback/google`
|
||
1. Under 'OAuth consent screen', click "PUBLISH APP"
|
||
|
||
### Obtaining Microsoft Graph Client ID and Secret
|
||
|
||
1. Open [Azure App Registration](https://portal.azure.com/#blade/Microsoft_AAD_IAM/ActiveDirectoryMenuBlade/RegisteredApps) and select New registration
|
||
2. Name your application
|
||
3. Set **Who can use this application or access this API?** to **Accounts in any organizational directory (Any Azure AD directory - Multitenant)**
|
||
4. Set the **Web** redirect URI to `<Cal.com URL>/api/integrations/office365calendar/callback` replacing Cal.com URL with the URI at which your application runs.
|
||
5. Use **Application (client) ID** as the **MS_GRAPH_CLIENT_ID** attribute value in .env
|
||
6. Click **Certificates & secrets** create a new client secret and use the value as the **MS_GRAPH_CLIENT_SECRET** attribute
|
||
|
||
### Obtaining Zoom Client ID and Secret
|
||
|
||
1. Open [Zoom Marketplace](https://marketplace.zoom.us/) and sign in with your Zoom account.
|
||
2. On the upper right, click "Develop" => "Build App".
|
||
3. Select "General App" , click "Create".
|
||
4. Name your App.
|
||
5. Choose "User-managed app" for "Select how the app is managed".
|
||
6. De-select the option to publish the app on the Zoom App Marketplace, if asked.
|
||
7. Now copy the Client ID and Client Secret to your `.env` file into the `ZOOM_CLIENT_ID` and `ZOOM_CLIENT_SECRET` fields.
|
||
8. Set the "OAuth Redirect URL" under "OAuth Information" as `<Cal.com URL>/api/integrations/zoomvideo/callback` replacing Cal.com URL with the URI at which your application runs.
|
||
9. Also add the redirect URL given above as an allow list URL and enable "Subdomain check". Make sure, it says "saved" below the form.
|
||
10. You don't need to provide basic information about your app. Instead click on "Scopes" and then on "+ Add Scopes". On the left,
|
||
1. click the category "Meeting" and check the scope `meeting:write:meeting`.
|
||
2. click the category "User" and check the scope `user:read:settings`.
|
||
11. Click "Done".
|
||
12. You're good to go. Now you can easily add your Zoom integration in the Cal.com settings.
|
||
|
||
### Obtaining Daily API Credentials
|
||
|
||
1. Visit our [Daily.co Partnership Form](https://go.cal.com/daily) and enter your information
|
||
2. From within your dashboard, go to the [developers](https://dashboard.daily.co/developers) tab.
|
||
3. Copy your API key.
|
||
4. Now paste the API key to your `.env` file into the `DAILY_API_KEY` field in your `.env` file.
|
||
5. If you have the [Daily Scale Plan](https://daily.co/pricing) set the `DAILY_SCALE_PLAN` variable to `true` in order to use features like video recording.
|
||
|
||
### Obtaining Basecamp Client ID and Secret
|
||
|
||
1. Visit the [37 Signals Integrations Dashboard](launchpad.37signals.com/integrations) and sign in.
|
||
2. Register a new application by clicking the Register one now link.
|
||
3. Fill in your company details.
|
||
4. Select Basecamp 4 as the product to integrate with.
|
||
5. Set the Redirect URL for OAuth `<Cal.com URL>/api/integrations/basecamp3/callback` replacing Cal.com URL with the URI at which your application runs.
|
||
6. Click on done and copy the Client ID and secret into the `BASECAMP3_CLIENT_ID` and `BASECAMP3_CLIENT_SECRET` fields.
|
||
7. Set the `BASECAMP3_CLIENT_SECRET` env variable to `{your_domain} ({support_email})`.
|
||
For example, `Cal.com (support@cal.com)`.
|
||
|
||
### Obtaining HubSpot Client ID and Secret
|
||
|
||
1. Open [HubSpot Developer](https://developer.hubspot.com/) and sign into your account, or create a new one.
|
||
2. From within the home of the Developer account page, go to "Manage apps".
|
||
3. Click "Create app" button top right.
|
||
4. Fill in any information you want in the "App info" tab
|
||
5. Go to tab "Auth"
|
||
6. Now copy the Client ID and Client Secret to your `.env` file into the `HUBSPOT_CLIENT_ID` and `HUBSPOT_CLIENT_SECRET` fields.
|
||
7. Set the Redirect URL for OAuth `<Cal.com URL>/api/integrations/hubspot/callback` replacing Cal.com URL with the URI at which your application runs.
|
||
8. In the "Scopes" section at the bottom of the page, make sure you select "Read" and "Write" for scope called `crm.objects.contacts`
|
||
9. Click the "Save" button at the bottom footer.
|
||
10. You're good to go. Now you can see any booking in Cal.com created as a meeting in HubSpot for your contacts.
|
||
|
||
### Obtaining Webex Client ID and Secret
|
||
|
||
[See Webex Readme](./packages/app-store/webex/)
|
||
|
||
### Obtaining ZohoCRM Client ID and Secret
|
||
|
||
1. Open [Zoho API Console](https://api-console.zoho.com/) and sign into your account, or create a new one.
|
||
2. From within the API console page, go to "Applications".
|
||
3. Click "ADD CLIENT" button top right and select "Server-based Applications".
|
||
4. Fill in any information you want in the "Client Details" tab
|
||
5. Go to tab "Client Secret" tab.
|
||
6. Now copy the Client ID and Client Secret to your `.env` file into the `ZOHOCRM_CLIENT_ID` and `ZOHOCRM_CLIENT_SECRET` fields.
|
||
7. Set the Redirect URL for OAuth `<Cal.com URL>/api/integrations/zohocrm/callback` replacing Cal.com URL with the URI at which your application runs.
|
||
8. In the "Settings" section check the "Multi-DC" option if you wish to use the same OAuth credentials for all data centers.
|
||
9. Click the "Save"/ "UPDATE" button at the bottom footer.
|
||
10. You're good to go. Now you can easily add your ZohoCRM integration in the Cal.com settings.
|
||
|
||
### Obtaining Zoho Calendar Client ID and Secret
|
||
|
||
[Follow these steps](./packages/app-store/zohocalendar/)
|
||
|
||
### Obtaining Zoho Bigin Client ID and Secret
|
||
|
||
[Follow these steps](./packages/app-store/zoho-bigin/)
|
||
|
||
### Obtaining Pipedrive Client ID and Secret
|
||
|
||
[Follow these steps](./packages/app-store/pipedrive-crm/)
|
||
|
||
## Workflows
|
||
|
||
### Setting up SendGrid for Email reminders
|
||
|
||
1. Create a SendGrid account (https://signup.sendgrid.com/)
|
||
2. Go to Settings -> API keys and create an API key
|
||
3. Copy API key to your `.env` file into the `SENDGRID_API_KEY` field
|
||
4. Go to Settings -> Sender Authentication and verify a single sender
|
||
5. Copy the verified E-Mail to your `.env` file into the `SENDGRID_EMAIL` field
|
||
6. Add your custom sender name to the `.env` file into the `NEXT_PUBLIC_SENDGRID_SENDER_NAME` field (fallback is Cal.com)
|
||
|
||
### Setting up Twilio for SMS reminders
|
||
|
||
1. Create a Twilio account (https://twilio.com/try-twilio)
|
||
2. Click ‘Get a Twilio phone number’
|
||
3. Copy Account SID to your `.env` file into the `TWILIO_SID` field
|
||
4. Copy Auth Token to your `.env` file into the `TWILIO_TOKEN` field
|
||
5. Copy your Twilio phone number to your `.env` file into the `TWILIO_PHONE_NUMBER` field
|
||
6. Add your own sender ID to the `.env` file into the `NEXT_PUBLIC_SENDER_ID` field (fallback is Cal.com)
|
||
7. Create a messaging service (Develop -> Messaging -> Services)
|
||
8. Choose any name for the messaging service
|
||
9. Click 'Add Senders'
|
||
10. Choose phone number as sender type
|
||
11. Add the listed phone number
|
||
12. Leave all other fields as they are
|
||
13. Complete setup and click ‘View my new Messaging Service’
|
||
14. Copy Messaging Service SID to your `.env` file into the `TWILIO_MESSAGING_SID` field
|
||
15. Create a verify service
|
||
16. Copy Verify Service SID to your `.env` file into the `TWILIO_VERIFY_SID` field
|
||
|
||
## Changesets
|
||
|
||
We use changesets to generate changelogs and publish public packages (packages with `private: true` are ignored).
|
||
|
||
An example of good readme is [atoms readme](https://github.com/calcom/cal.com/blob/main/packages/platform/atoms/README.md). Every public package must:
|
||
|
||
1. Follow semantic versioning when using changesets.
|
||
2. Mark breaking changes using `❗️Breaking change`
|
||
|
||
<!-- LICENSE -->
|
||
|
||
## License
|
||
|
||
Distributed under the [AGPLv3 License](https://github.com/calcom/cal.com/blob/main/LICENSE). See `LICENSE` for more information.
|
||
|
||
<!-- ACKNOWLEDGEMENTS -->
|
||
|
||
## Acknowledgements
|
||
|
||
Special thanks to these amazing projects which help power Cal.com:
|
||
|
||
- [Vercel](https://vercel.com/?utm_source=calend-so&utm_campaign=oss)
|
||
- [Next.js](https://nextjs.org/)
|
||
- [Day.js](https://day.js.org/)
|
||
- [Tailwind CSS](https://tailwindcss.com/)
|
||
- [Prisma](https://prisma.io/)
|
||
|
||
Cal.com is an [open startup](https://cal.com/open) and [Jitsu](https://github.com/jitsucom/jitsu) (an open-source Segment alternative) helps us to track most of the usage metrics.
|